Modeling with XGEE
Let’s dive into modeling the editorModel!
We have prepared the XGEE Example Application, which you can use as a starting point for your own project. The application includes an XGEE editor for the Function Layer of the Open Avionics Architecture Model (OAAM) , which is a domain-specific model for avionics systems. In this tutorial, you will make your first small steps with XGEE. You are going to learn how to edit the Functions Editor-Model which specifies what you can see and modify in the Functions Editor. For this purpose, the Functions Editor-Model is extended by a Failure Condition element, which allows to define failure conditions and their maximal occurrence probability.
Open Eclipse Plug-in
XGEE is developed in a model-driven way. Therefore we use the Eclipse Modeling Framework.
Install a current release of Eclipse Modeling Tools from Eclipse Packages.
Download the Ecplise Project of the Meta Model of the Editor
git clone git@gitlab.com:xgee/xgee-development/xgee-eclipse-projects.git
Open Eclipse in a new workspace.
In Eclipse open the folder EditorDefinitionMetaModel (File -> Open Projects from File System… -> Directory… , navigate to xgee-eclipse-projects/EditorDefinitionMetaModel, click Select Folder, click Finish).
In the Eclipse Model Explorer, open EditorDefinitionMetaModel/editorModel.genmodel by double clicking on it.
In the newly opend tab right click on the EditorModel and select Generate All to generate the Eclipse Plugin
Now run the EditorDefinitionMetaModel.editor as a seperate Eclipse Application (right click EditorDefinitionMetaModel.editor -> Run As -> 1 Eclipse Application). The two problems with the httpclient can be ignored. Problems with the SLF4J can also be ignored.
Work with the Editor Model
Make sure, you have completed Getting Started. From the new Eclipse instance, open xgee-example-application/App/plugins/editor.oaam.functions/Functions.editorModel (File -> Open File).
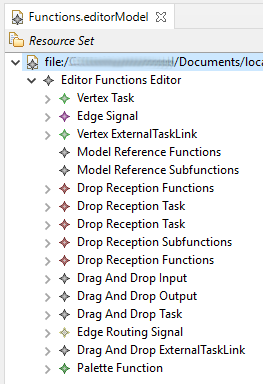
Now we can edit the Editor Model, which looks like this:
The Functions-Editor can now be modified using the Meta-Model. Children can be created and properties can be set.
Since we want to add a Failure Condition, we first have to design its Vertex such that it can be represented. Then we add a tool to create them.
Modeling Vertices
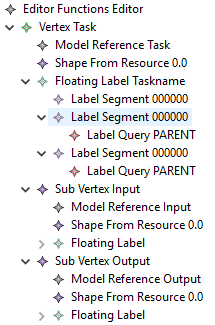
Before we create the Vertex of the Failure Condition, we have a closer look at the already existing Vertex Task. Its Model Reference defines to which class in the OAAM it belongs to. The Shape From Ressource element chooses, which vector graphic to render, plus its rotation and horizontal and vertical size.
Each Vertex and Edge in XGEE must define a Query. The Query (written in EOQ – Essential Object Query language) defines how data is fetched or bound dynamically at runtime. Also, a unique ID for each element is generated at runtime. When extending an existing model, always ensure that newly created elements have valid EOQ query.
The Floating Label is a little bit more tricky. It consists out of three Label Segments. The first Label Segment contains the simple text “Task”. The second uses an EOQ query ({TASKNAME}) to render its name. The last Label Segment prints the name of its tasktype ({TASKTYPE_NAME}), if set.
The Vertex Task contains two subvertices: Input and Output. Similarly to its Parent Vertex (Vertex Task), they contain a Model Reference, a Shape From Ressource and a Floating Label.
Now that we talked about Vertices, let’s create our own Vertex to hold the Failure Condition element. First right click on the Editor Functions Editor -> New Child -> Vertex to create a new Vertex.
You can change the name of the newly created Vertex by clicking on it and changing its Name property in the bottom window to “FailureCondition” [1]. The query string according to OAAM is “Pth(‘failureConditions’)”, so we need to change the Query Str property to “/failureConditions”. Then set the Query Target to PARENT. You may also want to set the dimensions of the Vertex by setting its Size X and Size Y properties. Furthermore it is useful to set the properties Is Deletable, Is Moveable and Is Resizeable to “true”.
Hint: To change the Query Target property, you need to click in the value field on the right side of the property field and select “PARENT” from the dropdown menu.
To know more about the property, please refer to Documentation.
Vertex Failure Condition
Property |
Value |
|---|---|
Name |
FailureCondition |
Query Str |
/failureConditions |
Query Target |
PARENT |
Size X |
50 |
Size Y |
50 |
Is Deletable |
true |
Is Moveable |
true |
Is Resizeable |
true |
Method 1 - GeometricShape:
Available GeometricShapes: Rectangle, Isosceles Triangle, Rounded Rectangle
Next we want to add a visual representation to the Vertex. This is done by adding a Geometric Shape. Therefore right click on our Vertex FailureCondition -> New Child -> Select the desired/suitable shape from the above 3 options - For e.g. Rectangle. Clicking on the added Rectangle element opens its property window. You can also set the properties for the visual representation of the Rectangle.
Property |
Value |
|---|---|
Name |
FailureCondition |
Fill color |
#FFFD8F |
Rotation |
0.0 |
Stroke color |
#000000 |
Stroke width |
2 |
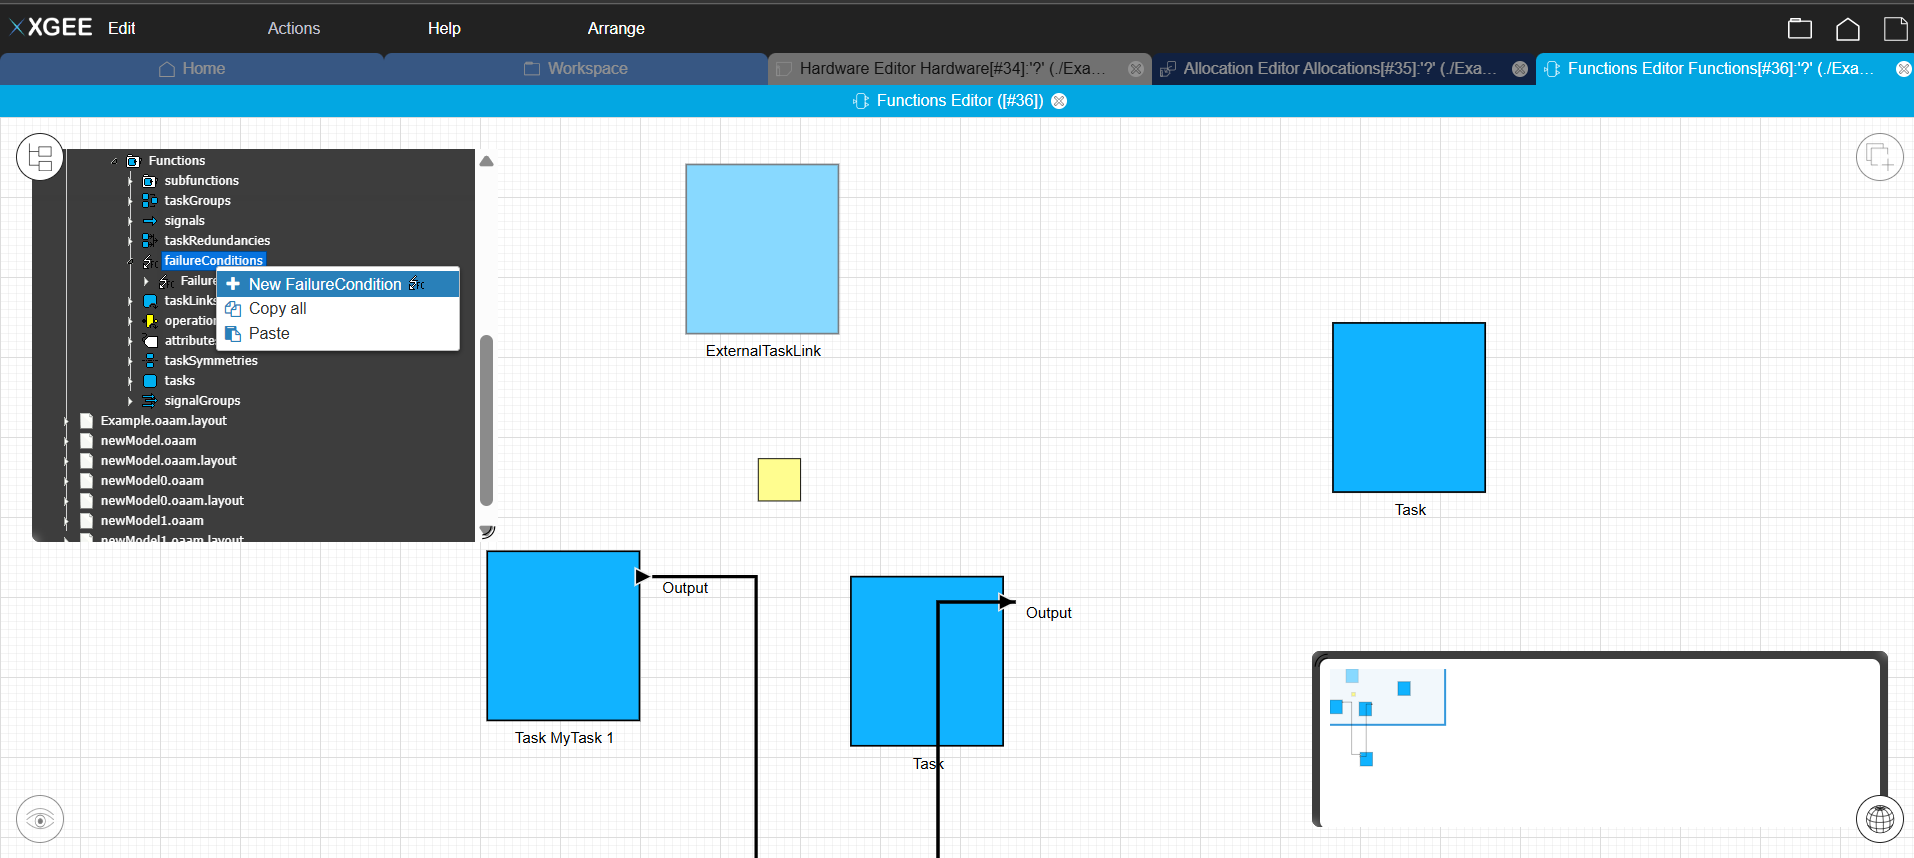
You can now visualize the Failure Conditon vertex by opening the Example.oaam in the XGEE web app. In the Example.oaam switch to the Functions Editor tab and click on the model tree in the upper left corner. In the model tree, naviagte to Workspace -> Example.oaam -> Architecture -> functions -> Functions. There you can see an element failureConditions. Right clicking on it and selecting New FailureCondition adds a Failure Condition Block to the editor. Congratulations! You successfully modfied the Functions Editor-Model so that Failure Conditions can be added to the Functions Editor.
Method 2: ShapeFromResource
Using Shape From Resource (This is basically old way of adding shapes from an .svg file for the corresponding shape representation) So we want to add a visual representation to the Vertex. This is done by referencing a .svg-file containing an image. To do so, we right click on our Vertex FailureCondition -> New Child -> Shape From Ressource. Clicking on the added Shape From Resource element opens its property window. Now we can reference a .svg-file by entering its path. Luckily we already created a .svg-file with the name failureCondition.svg in the shapes/ folder for you. Just enter the path “shapes/failureCondition.svg” in the Filepath property and save your changes.
- Vertex FailureCondition
->Shape From Resource
Property |
Value |
|---|---|
Filepath |
shapes/failureCondition.svg |
You can follow similar process as mentioned in Method 1 to visualize the Failure Condition vertex in the XGEE Functions Editor.
Note
You can of course also create your own .svg files for other shapes. Just make sure that the .svg file only contains one shape.
Both these methods achieve the same result. You can choose whichever you prefer. But easier and currently preferred is the Method 1.
If you followed both the methods for adding failureCondition the shapes will be drawn twice in the XGEE editor and initially overlap each other.
Adding objects via the tree is somewhat complicated. It would be easier if we could just drag and drop the Failure Condition from our palette on the upper right corner like we do with the Task-Vertices. This will be covered in the next sections.
Tools
To be able to add something from the palette to the editor in XGEE, we need a tool. We start by copying and pasting the Drag and Drop Task in Eclipse and modify it to adapt it to our FailureCondition element. Therefore we change its properties according to the FailureCondition element. This includes changing its Icon, Name, Id and Tooltip properties as follows:
Drag and Drop FailureCondition
Property |
Value |
|---|---|
Icon |
icons/fc_preview.svg |
Id |
failureconditiontool |
Name |
Failure Condition |
Tooltip |
Create a new failure condition |
The Icon property includes a path to a .svg file which defines how the Failure Condition will later be displayed in the palette. Next expand the model tree an set the Cmd String property of the Drag and Drop Failure Condition to:
- Drag and Drop FailureCondition
- ->Compund Cmd
->Cmd
Property |
Value |
|---|---|
Cmd String |
CRN “http://www.oaam.de/oaam/model/v160/functions” FailureCondition 1 |
Finaly we copy the Drop Reception Functions element and adapt it to the FailureCondition by adjusting its properties. For this we change the Drop Item Class Name and Cmd property to:
Drop Reception Functions
Property |
Value |
|---|---|
Drop Item Class Name |
FailureCondition |
Cmd |
ADD #{DROPTARGET} failureConditions #{DROPITEM} |
Expand the Drop Reception Functions element to edit the Cmd element:
- Drop Reception Functions
- -> Compound Cmd
-> Cmd
Property |
Value |
|---|---|
Alias |
_ADDFAILURECONDITION |
Cmd |
ADD #{DROPTARGET} failureConditions #{DROPITEM} |
Now we have created a Tool to Drag and Drop a Failure Condition in our XGEE Functions Editor. But right now we do not see a Failure Condition element in the palette. That’s because we did not add it to the palette yet.
Palette
To add the Failure Condition element to the palette we just need to add the tool Drag and Drop Failure Condition which we created previously to the Palette Function in the Eclipse model tree. If you expand the model tree you can see that there are already multiple Categories which correspond to the Categories represented in the palette in XGEE. Since the Failure Condition does not match any of the already existing categories we need to add a new category to the Palette Function. This is again done by right clicking on Pallete Function -> New Child -> Catergory. Finaly change the properties as follows and you are done!
- Palette Functions
->Category Failure Condition
Property |
Value |
|---|---|
Name |
Failure Condition |
Tools |
Drag and Drop Failure Condition |
Hint: To change the Tools property you need to click on the the dots […] on the right side of the property field
Testing
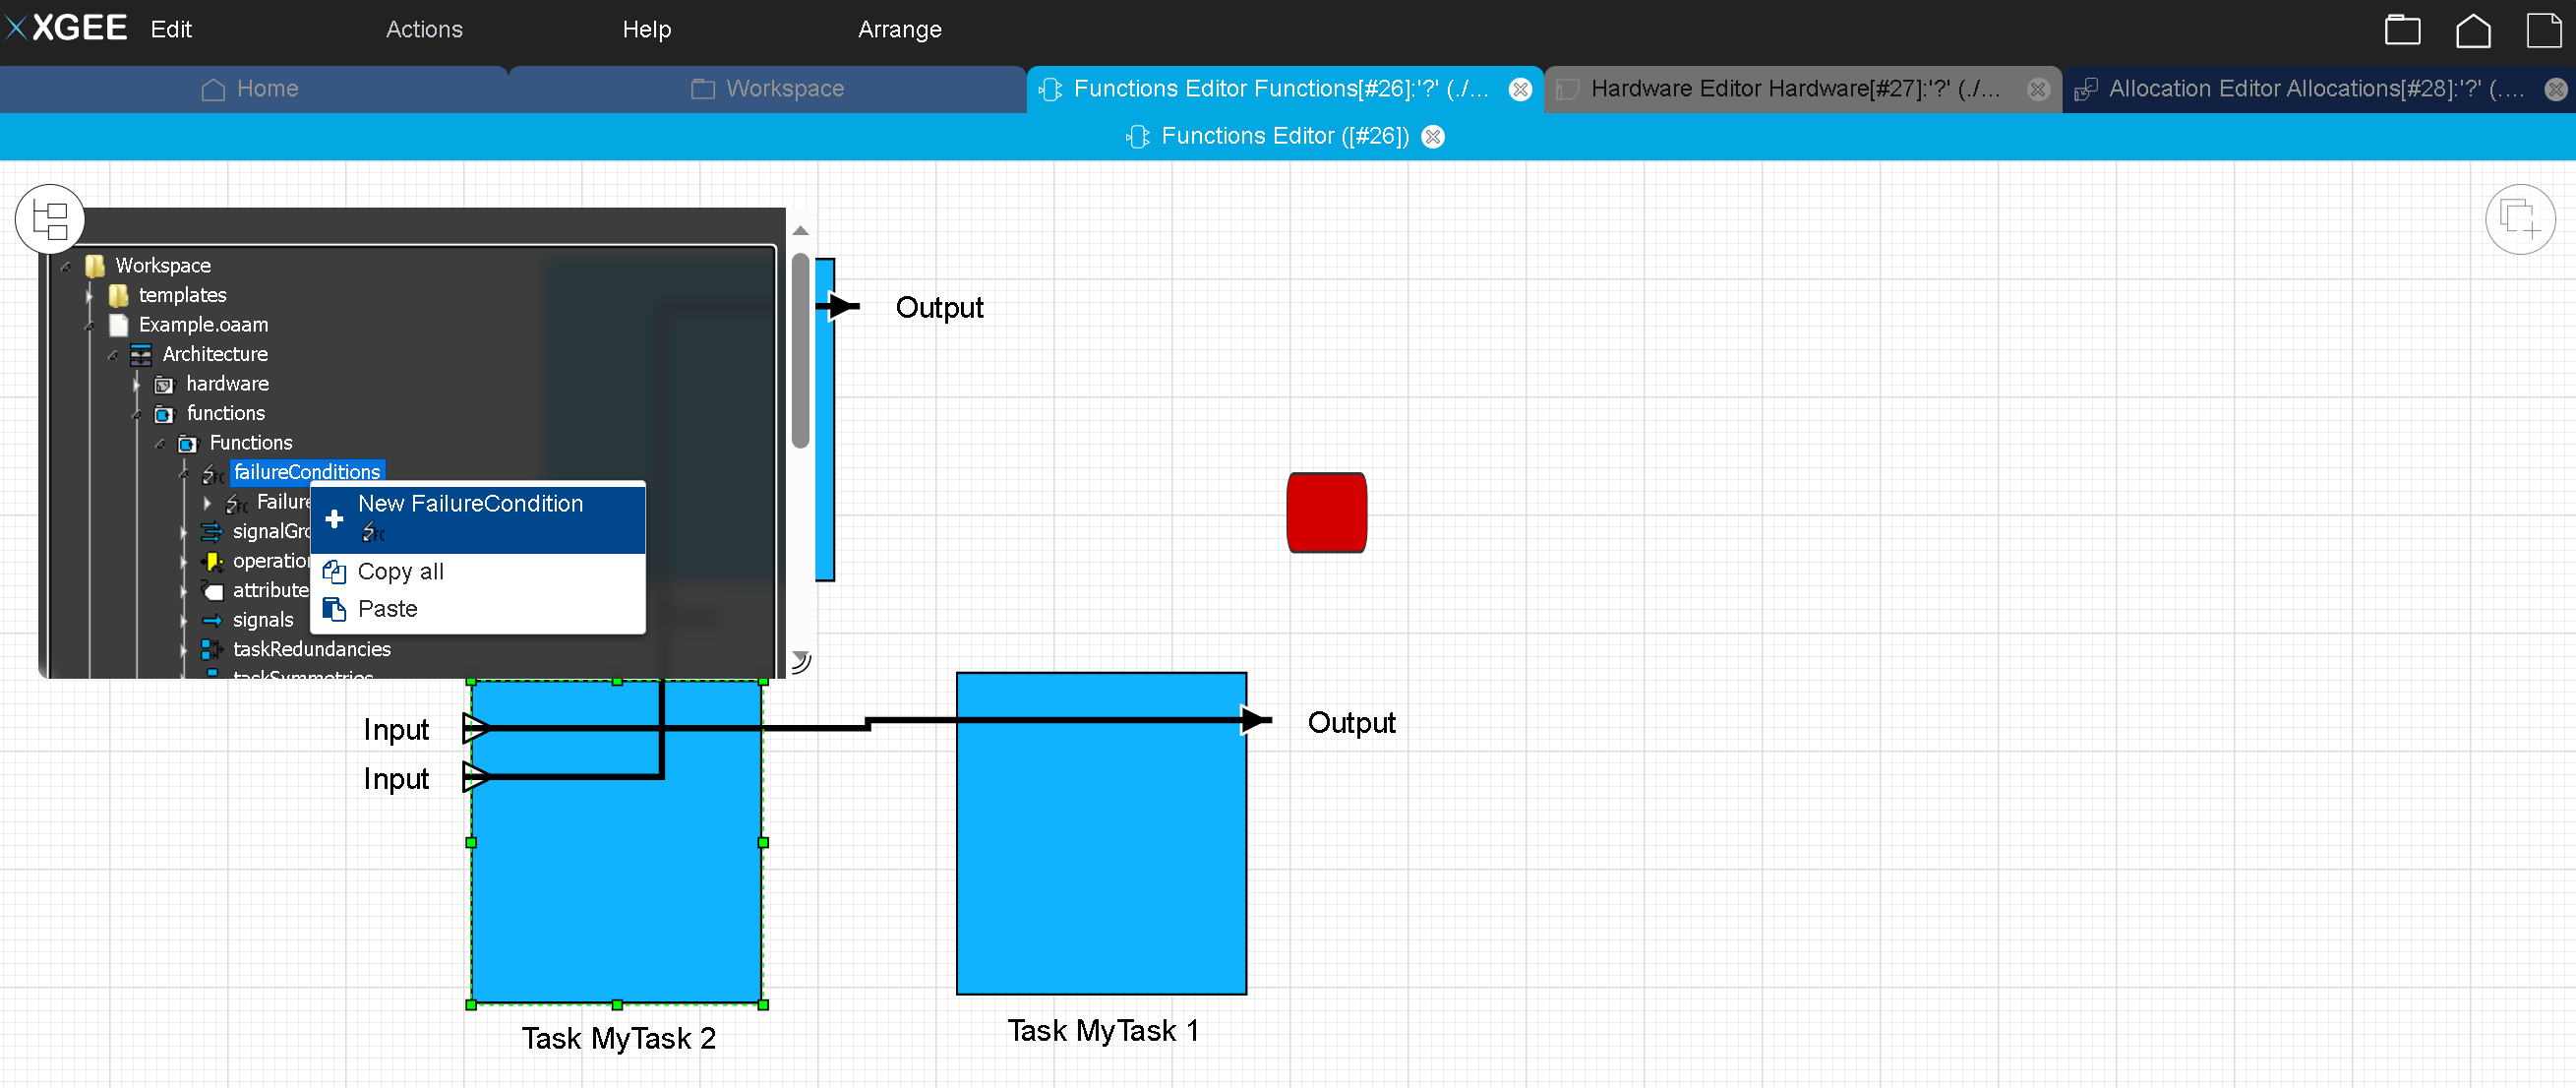
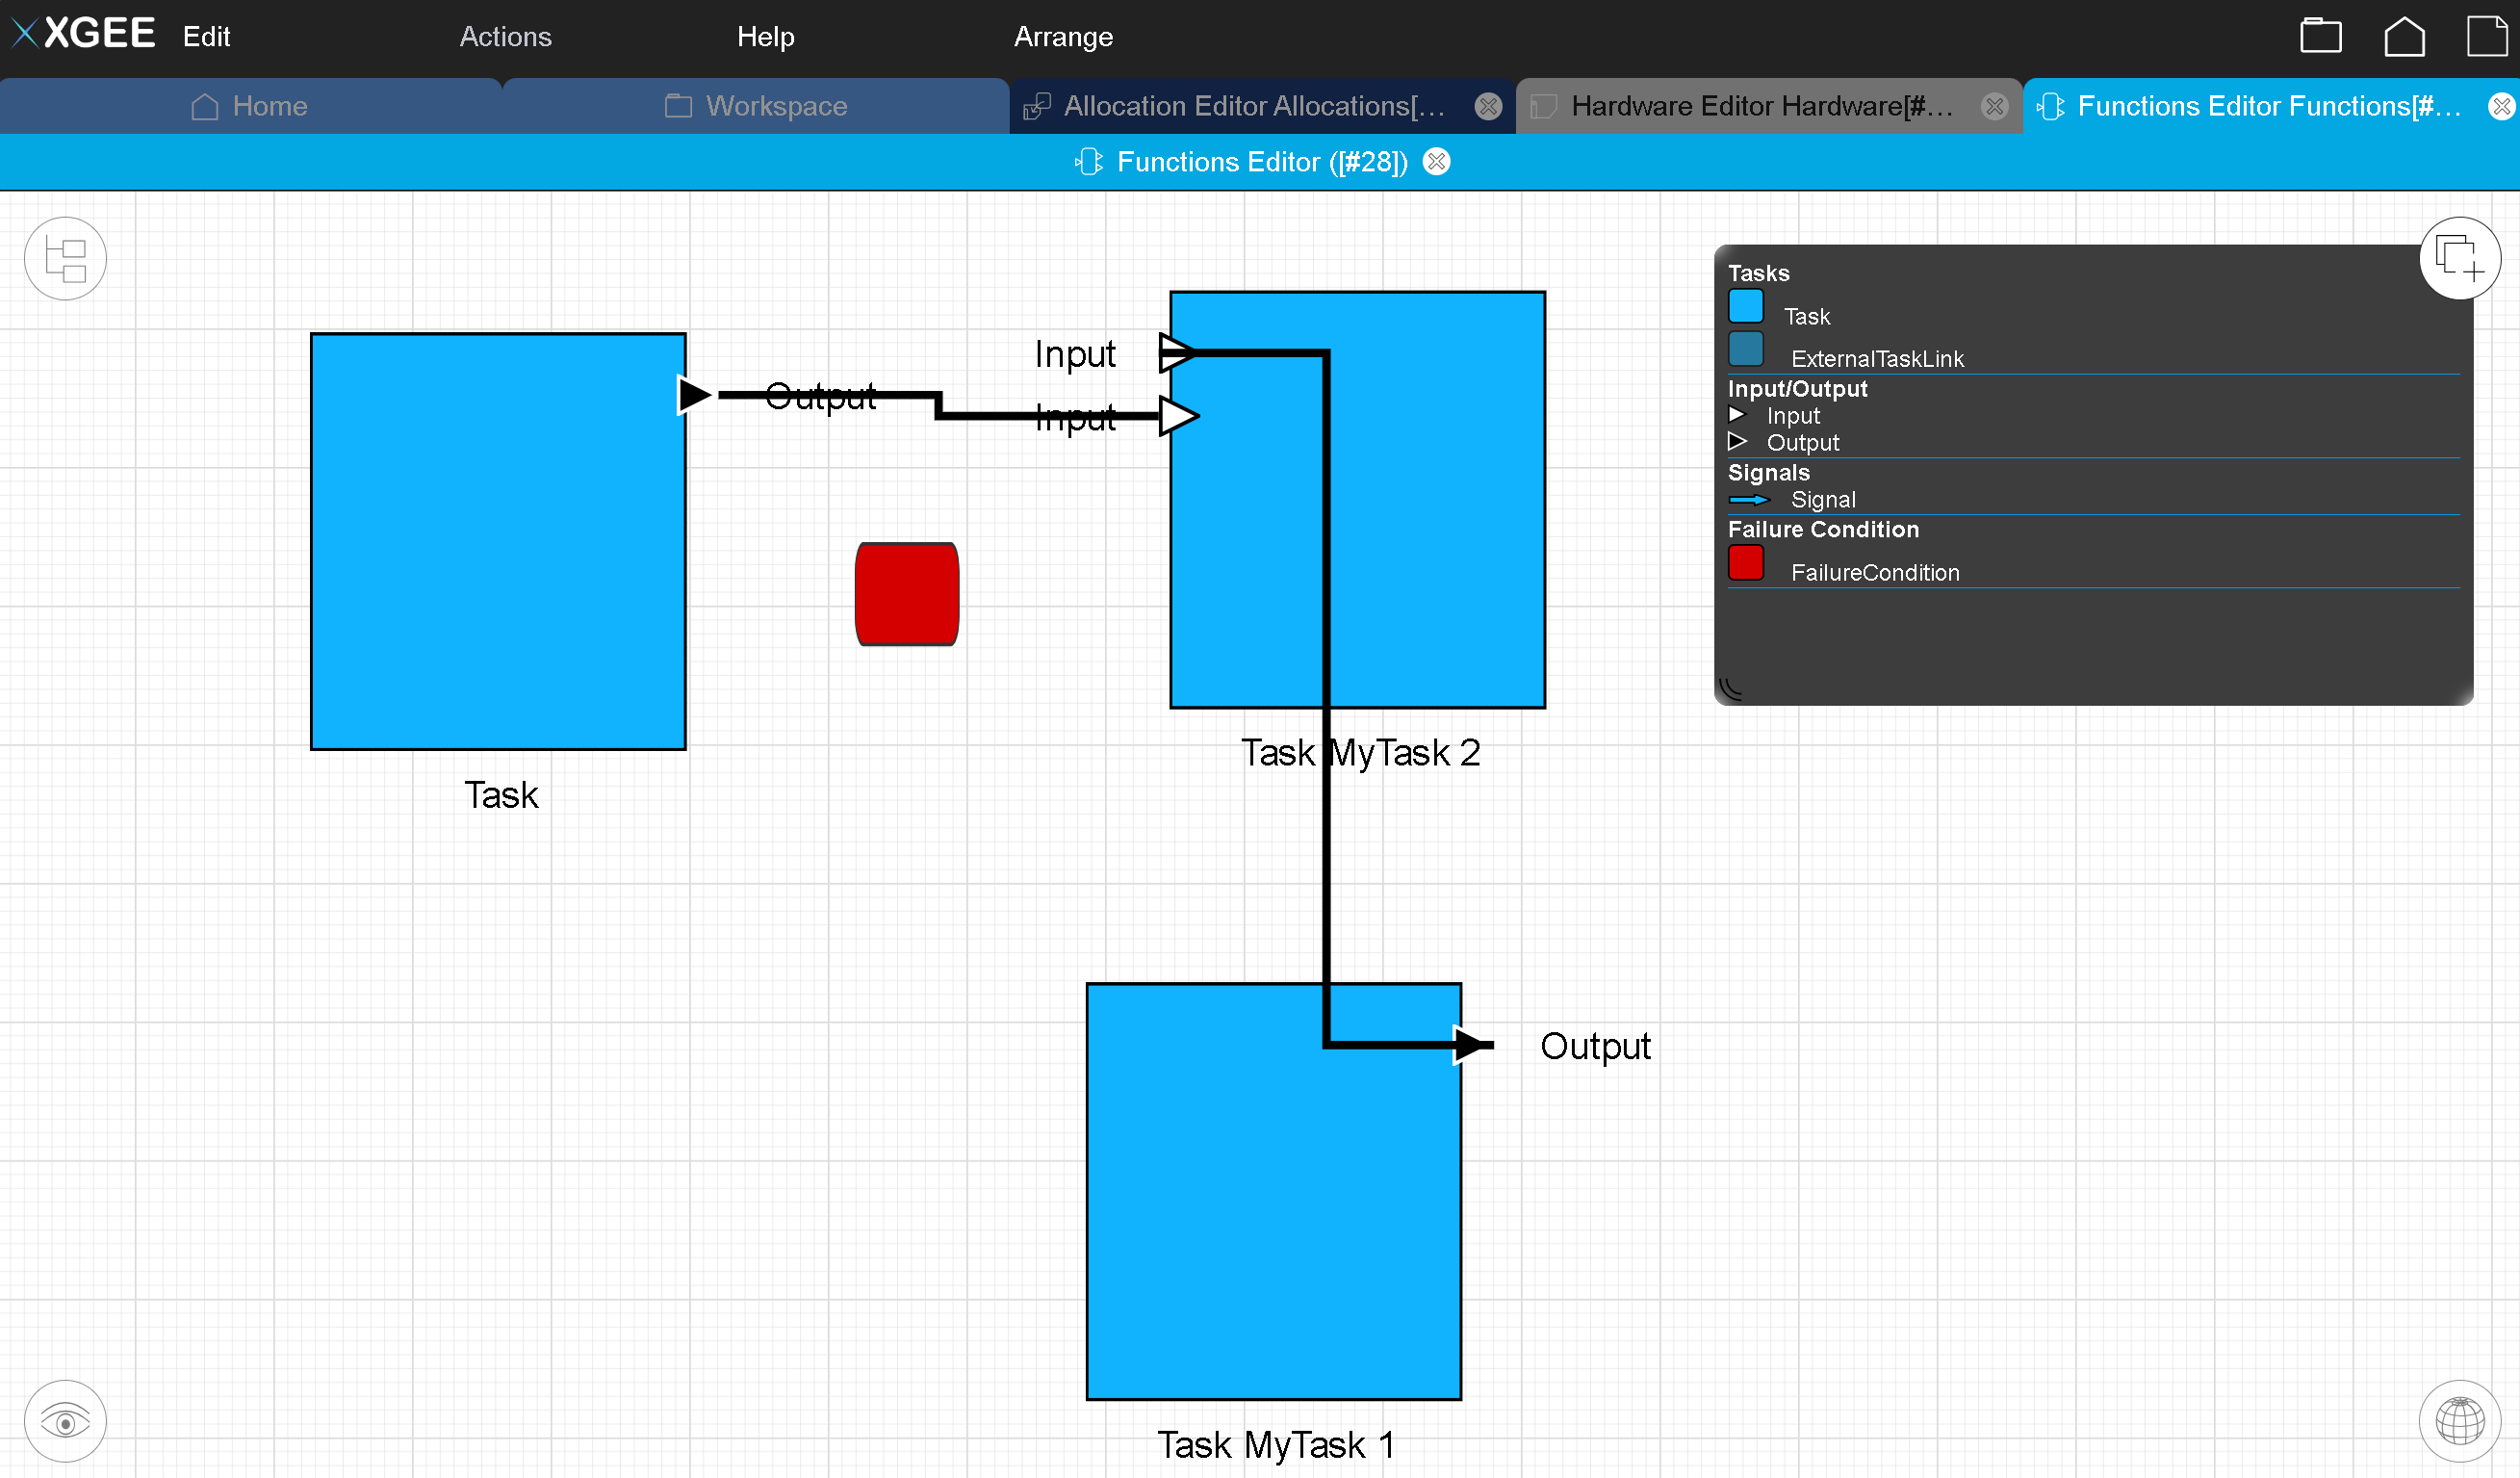
Let’s test the newly introduced Failure Condition. To see the changes save the Functions.editorModel and go to your web browser. In the tab where you opened XGEE, open the Developer Tools and disable the cache. Leave the Developer Tools open and refresh the web browser. The changes should be visible immediately. Now the Functions Editor looks like this:
Footnotes