Designing an Editor Model
We have prepared an XGEE example application, which you can use as a starting point for your own project. The application includes an XGEE editor for the Hardware Layer of the Open Avionics Architecture Model (OAAM) , which is a domain-specific model for avionics systems. In this tutorial, you will learn how can extend the XGEE example application with a self-made XGEE editor for the Functions Layer of the OAAM.
Create New Editor Model
Open the Eclipse Runtime for with the meta-model of the editor like we have done it in Modeling with XGEE.
Create a new project. (File -> New -> Project…, General/Project). As a location, create a new folder in App/plugins and call it editor.oaam.myfunctions. This will be the plugin-id.
Now create a new EditorModel (File -> New -> Other…, Example EMF Model Creation Wizards/Editor Model). Call it e.g. MyFunctions.editorModel.
Give the editor a name, and set its unique editor-id to oaam-myfunctions.
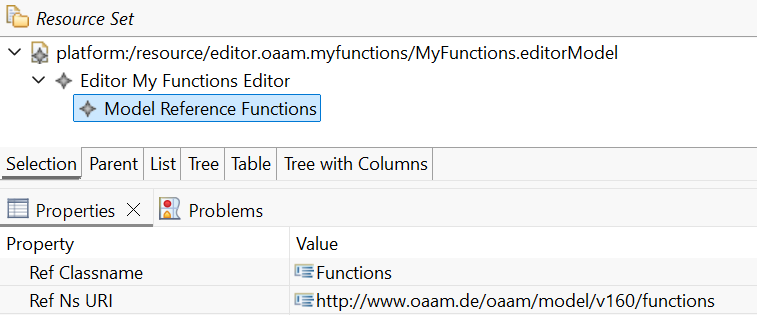
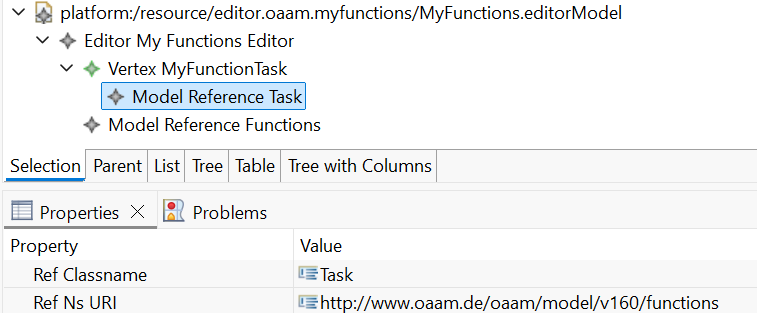
The EditorModel has now to be linked to a Class in the ECORE Metamodel, which defines the domain specific language. This is accomplished by the Model Reference, which can be created as a child of Editor. Speficy uniquely, which class of the metamodel the editor shall edit by setting the namespace URI and the class name. In our example, we choose ‘Functions’ in ‘http://www.oaam.de/oaam/model/v160/functions’. The oaam.ecore metamodel is already available for XGEE in Workspace/.meta. Now it looks like in the following picture.
Package as jsApplication Plugin
This section briefly summarizes the steps in order to integrate the still empty editorModel as a jsApplication Plugin. For further details, read Integrating your XGEE editor model.
Create the a JavaScript file with the name plugin.js, add the following content and put it into editor.oaam.myfunctions. We provide the path of the MyFunctions.editorModel, insert the plugin-id and require other plugins.
export async function init(pluginAPI) {
        pluginAPI.implement('xgee.models',{
        modelPath: pluginAPI.getPath()+'MyFunctions.editorModel'
    })
    return true
};

export var meta={
    "id":"editor.oaam.myfunctions",
    "requires":["ecore","editor"]
};
Add the plugin to the load your custom editor on the startup of XGEE
After creating your plugin file (for example: plugin.js) and placing it in the correct folder App/core/plugins/editor.oaam.myfunctions/, you need to make sure it is loaded automatically when XGEE starts.
Open the file App/index.html and locate the JavaScript section that defines the application’s startup configuration (the *PLUGIN CONFIG* block). Inside this block, add an entry for your plugin as shown below:
'editor.oaam.myfunctions': {
    enabled: true,
    pluginPath: 'plugins/'
},
This tells the jsApplication framework to automatically load the plugin.js file from App/core/plugins/editor.oaam.myfunctions/ when the editor starts.
Why this step is necessary
If the plugin is not listed in the autostart configuration, your custom context menu (or any other plugin functionality) will not be initialized — you’ll see that the context menu stays unchanged in the editor.
After saving the change to index.html, refresh your browser with the cache disabled (open Developer Tools → Network → “Disable cache” → reload the page). Your new context menu entries should now appear immediately in the editor.
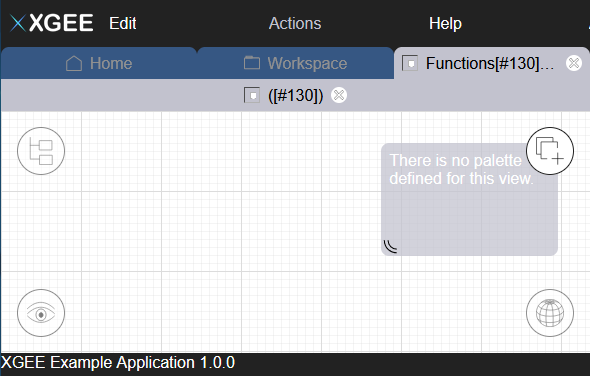
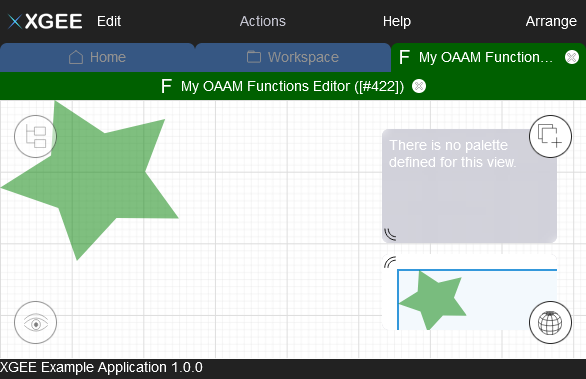
Now we have a stub of a new editor, which look like this:
Optical Modifications
Even though it is not necessary for the functionality, we take a short look at the style of XGEE editors. Therefore we use the editor-id myfunctions.
Inside the jsApplication framework, XGEE creates a tab and a graph-view element for every registered editor. Its style can be modified in App/core/css/app.css. Make the text white and color its background in green with the following code:
.graph-view-myfunctions .jsa-view-header{
    background-color: #006000;
    color: #ffffff;
}
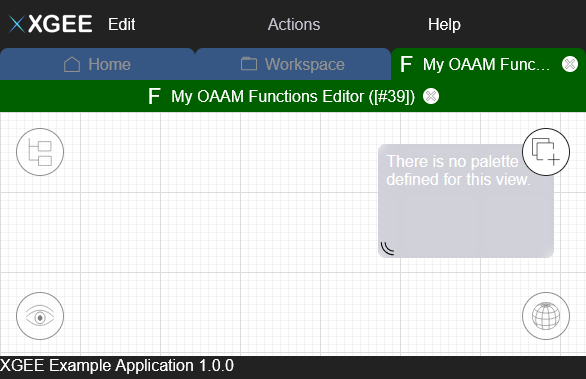
Design or copy an svg icon, name it graph-view-myfunctions.svg and put it into the folder App/core/img. Now it looks like this:
Adding Representations
A typical editor usually needs some vertices, edges, a palette, and some tools like Drag and Drop and Edge Routing. Before we dive into editing, we start by adding some first representations.
In XGEE, switch to Home and create a new model. In your file explorer go to Workspace and open the new created newModel.oaam in a text editor. Manually add a first task with the following code. (Other possibilities are using the already existing function editor or the OAAM Eclipse Editor.)
<functions>
<tasks name="myTask"/>
</functions>
Going back to the editor, we don’t see anything. This is because in the editorModel of XGEE, Tasks are currently not yet modeled. Let’s change that. We add to the Editor a Child Vertex. Give it an id and a name. Like in the first tutorial, we use EOQ queries to specify that we want to represent tasks.
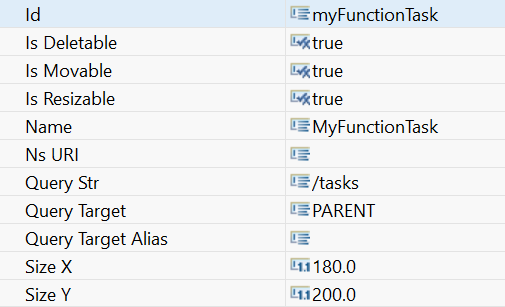
Similarly, now we add another child vertex called Model Reference for this MyFunctionTaskVertex. The EOQ queries and Model references are necessary for every OAAM Element.
Now we add a Shape From Resource. We design or copy a shape for every task. Any svg can be used. Create a subfolder in the plugin folder where you copy the svg. In the editor properties specify the repository URL relative to the plugin folder.

In the Shape from Resource properties specify the filename. The properties Size X and Y are currently not taken from here, but from the Vertex’ properties. Feel free to modify them.

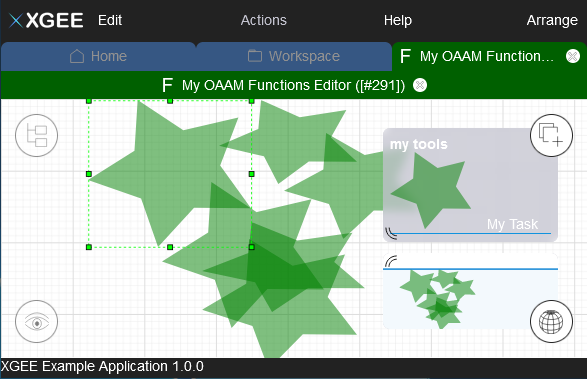
Now we have modeled everything that is needed, to display OAAM Tasks within the functions layer. Save the editorModel, refresh the browser and open your oaam model. It should look similar to the following picture. As you can see, you can be creative with the shapes 😉
Making it editable
From Viewer to Editor
So far, we have a viewer, but now we want to make it an editor. You can already modify element properties by double-clicking a vertex. Next, enable the Is Movable flag in the vertex properties. This allows you to move and resize tasks in the editor.
Enabling Task Creation
To create tasks from the palette, the editor requires three elements:
Drop Reception – allows the editor to accept dropped elements.
Drag and Drop Tool – defines what object can be created and dragged.
Palette – displays and organizes available tools.
Step 1: Add a Drag and Drop Tool
We want to drop a Task into the Function Editor. Add a Drag and Drop Tool as a child of your editor. Give it a name and ID, enable Provides Template, and add a Factory Command with:
CRN 'http://www.oaam.de/oaam/model/v160/functions' Task 1
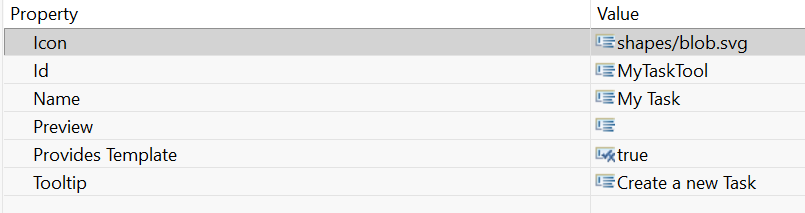
This command creates a new Task instance. Also, assign an icon so it appears in the palette.
Step 2: Add a Drop Reception
Next, define where the dropped elements are added. Add a Drop Reception as a child of the editor with:
Drop Target: Functions
Drop Item: Task
Command:
ADD #{DROPTARGET} tasks #{DROPITEM}
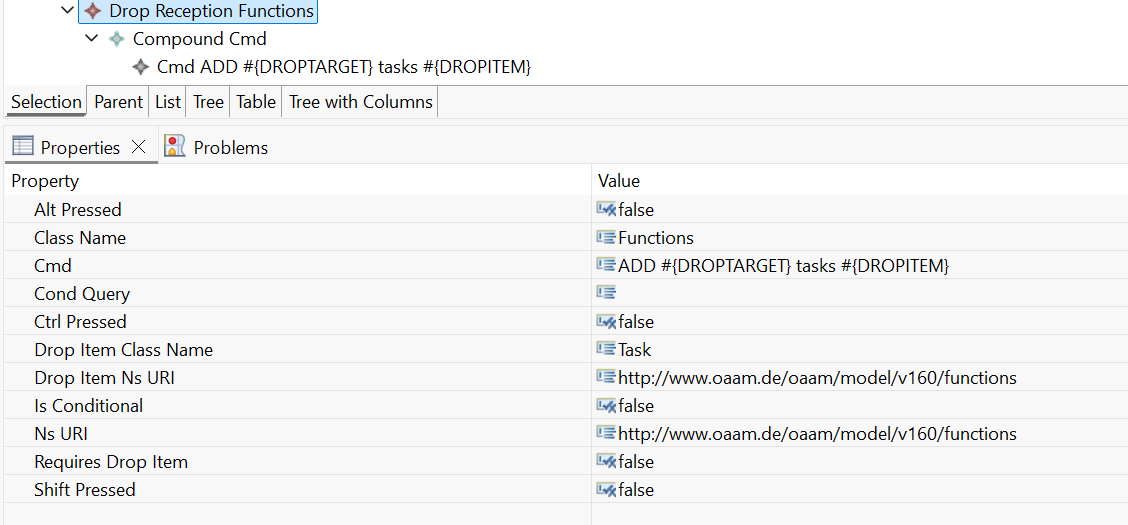
This links the new Task to the current Functions element. XGEE resolves DROPTARGET and DROPITEM automatically based on the model context.
Add a Compound Command as a child and include a Command with:
Alias: _ADDTASK
Command: ADD #{DROPTARGET} tasks #{DROPITEM}
Step 3: Add a Palette
Finally, add a Palette to the editor.
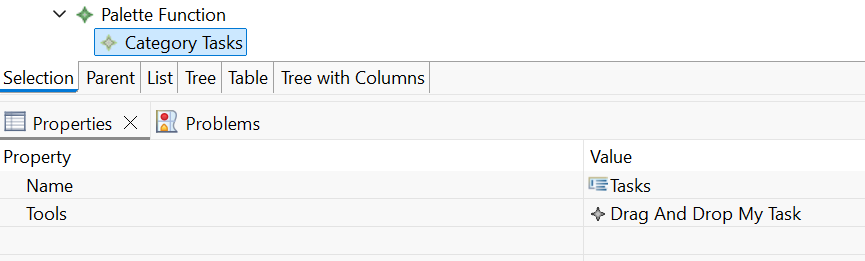
Create a Category (for example, “Tasks”) and include your Drag and Drop Tool inside it.
Result
Now you have a basic editor that allows moving, resizing, and creating new tasks through drag and drop. You can continue expanding it with more shapes, tools, or interactions for advanced functionality.